Setting up your smart bird feeder

Thanks for setting up a bird feeder for this silly project! I appreciate your enthusiasm for office window based bird watching. Once you've set up your bird feeder you should start seeing pictures like these appear in the community gallery from your feeder. Check out the gallery here. If you'd rather not share photos publicly you can opt out and save them to your device instead by disabling sharing in the settings.


Robin on Robin crime and early morning mouse friends
Connecting the Pi to the Internet
Before setting up your bird feeder you need to connect your Raspberry Pi to the internet. This can be achieved by using an ethernet cable (if using this method skip to the next section) or by connecting a USB keyboard, mouse, HDMI cable, and the provided Micro USB power cable and configuring your network connection (see below).

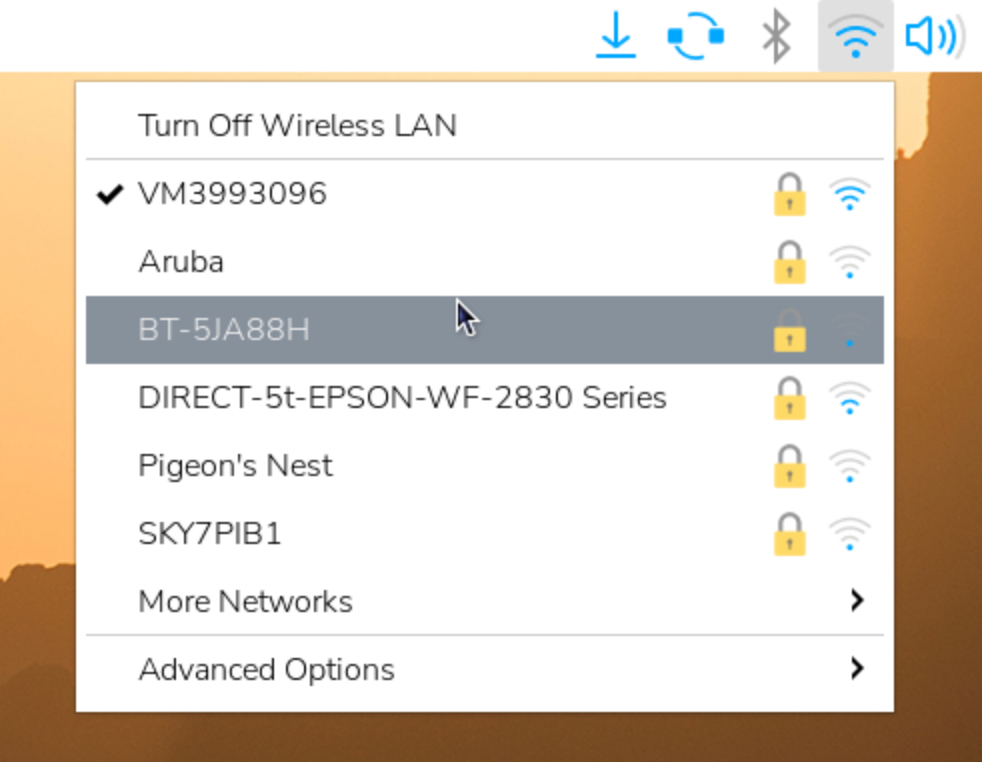
Somehow "Pigeon's Next" isn't my router
Setting up the feeder
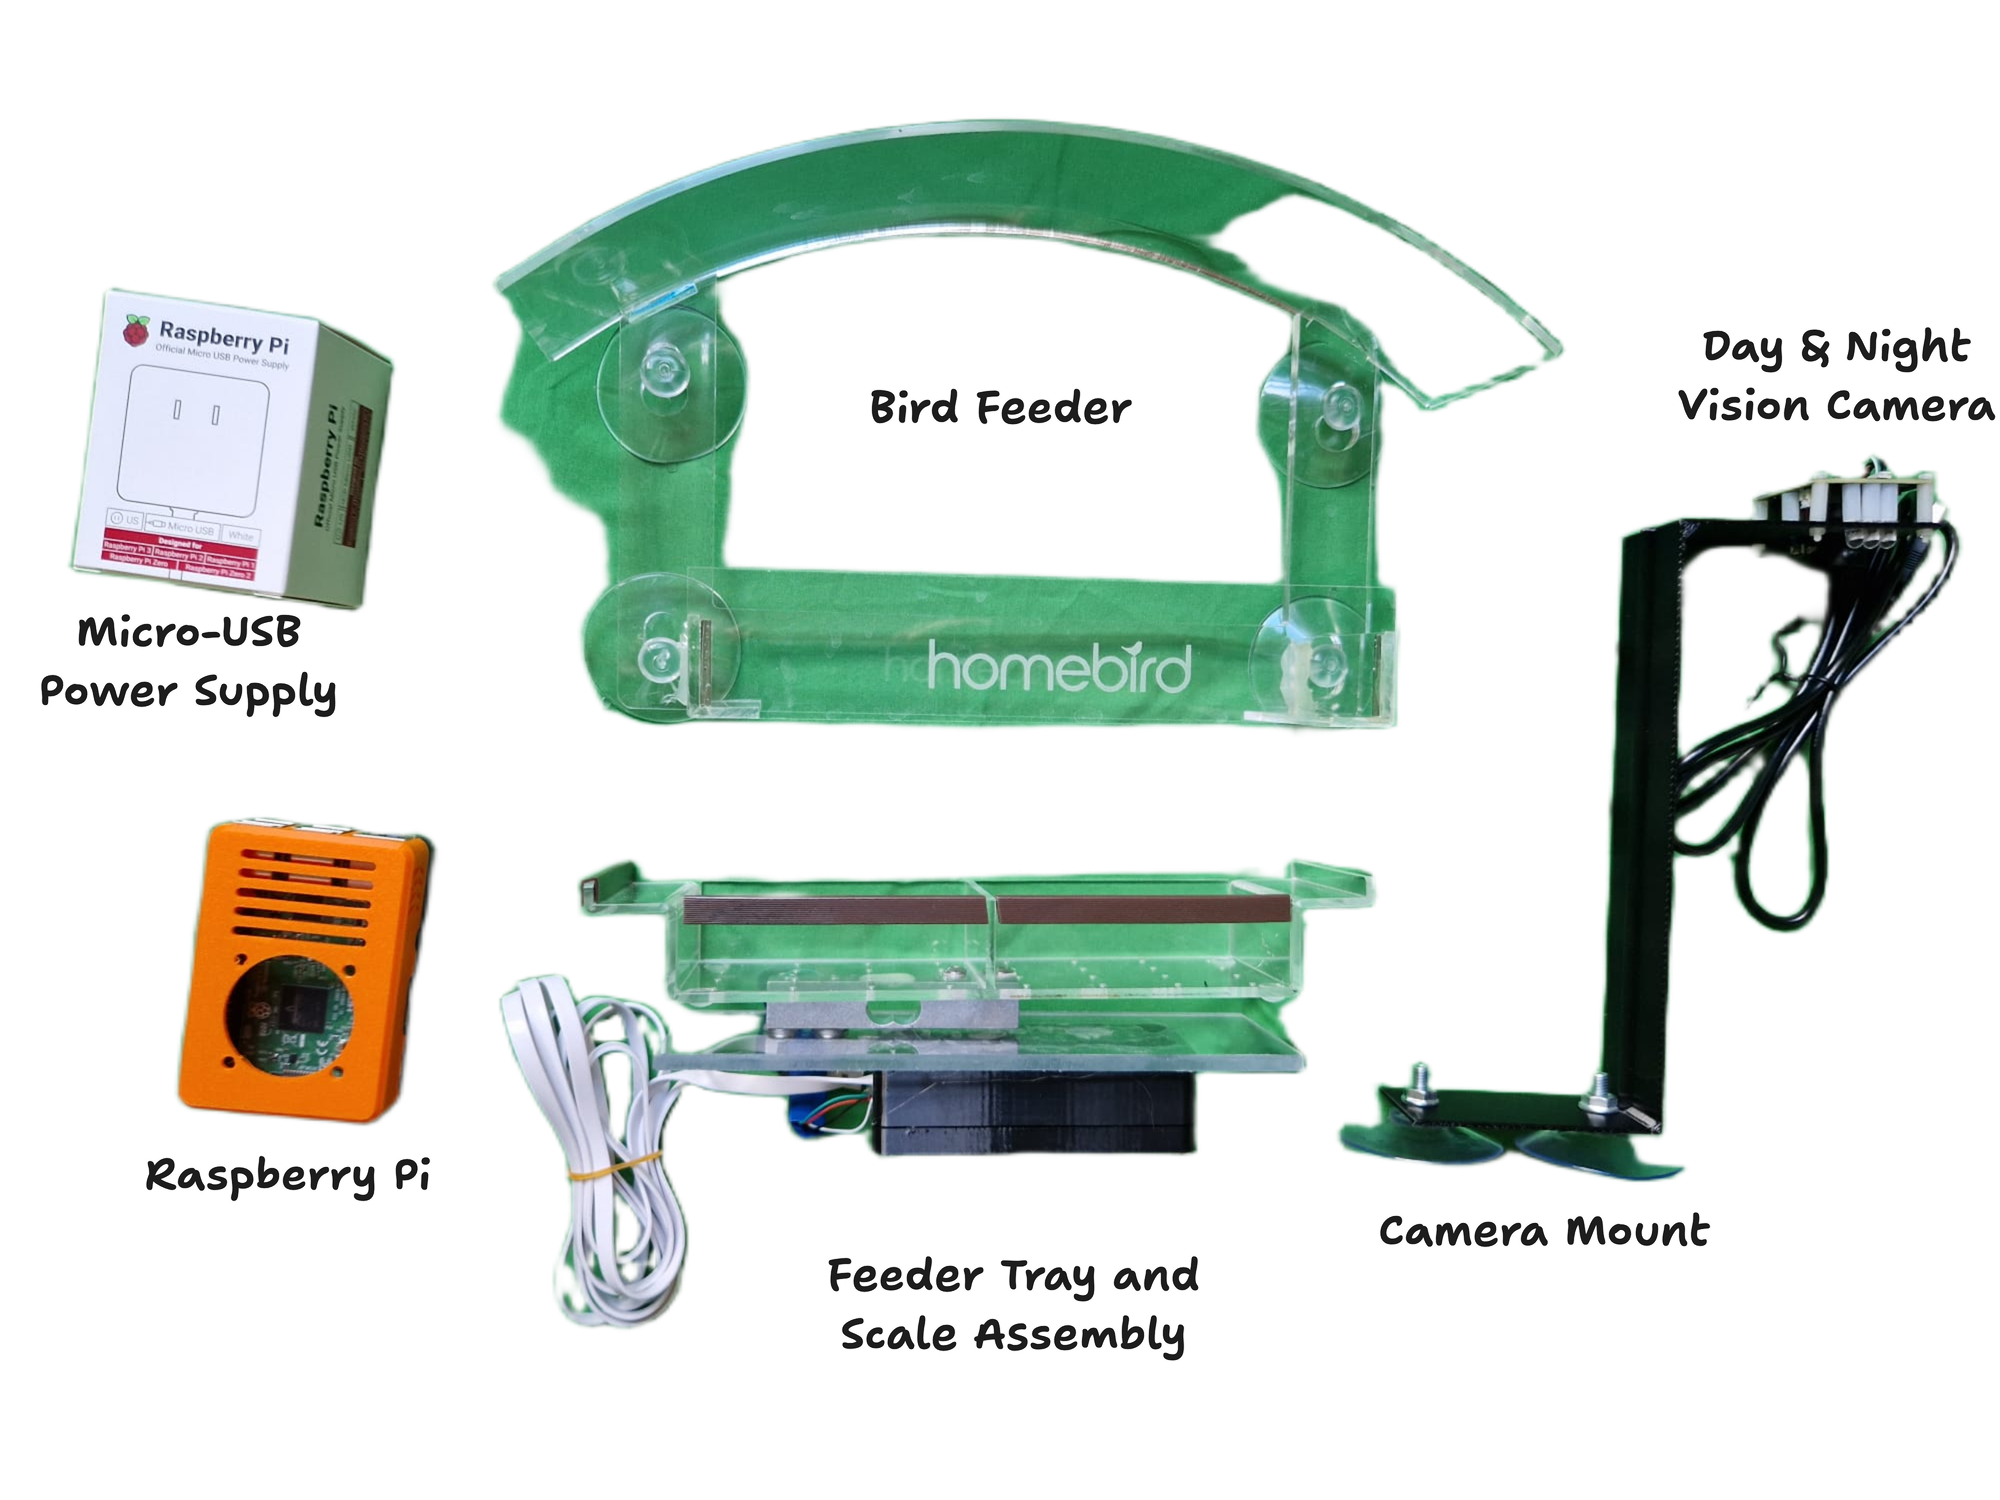
You should have received (or if you're feeling more ambitious, sourced and 3D printed, and configured as per the instructions on GitHub) the following parts:
- Stick the bird feeder in the desired location on the outside of your window as in the image below. Seat the feeder tray and scale assembly inside the feeder, the brown perches should face outwards and the USB cable should be threaded though the rectangular hole in the base of the feeder as shown in the image below. Run the USB cable through your open window, leave some slack on the cable outside, you can safely close the window on the cable.

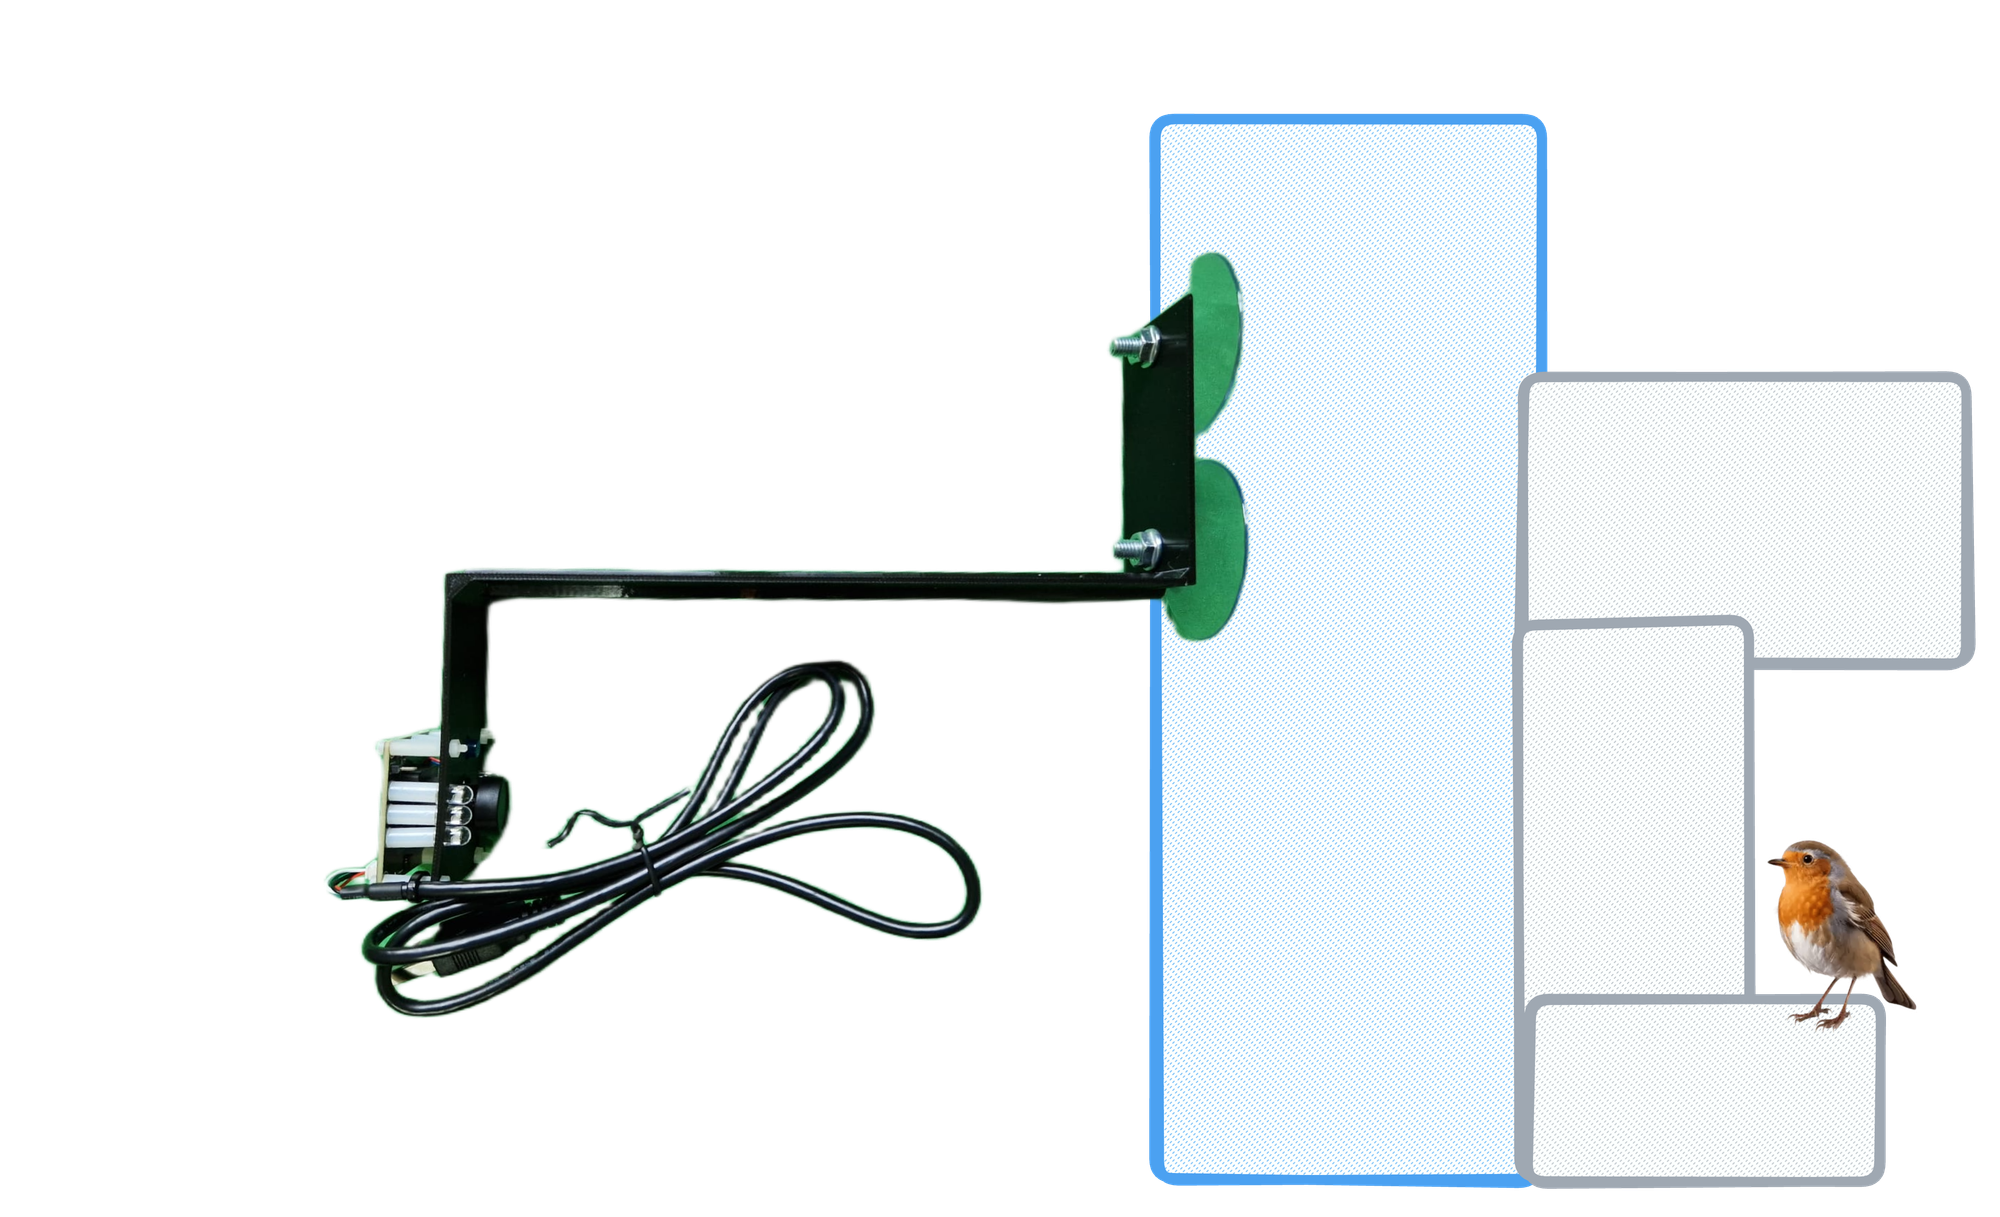
- Next on the inside of the window facing the bird feeder stick the camera mount to the window so the camera is centred on the feeder with the lens height just below the roof of the bird feeder. The mount should be oriented as shown in the image below with the USB cable hanging down.
- Plug in both the black camera USB cable and white scale USB cable as shown in the image below (if using an ethernet cable for the internet also plugin this in now). Plug in the Micro USB power cable.

If everything is setup correctly you should see an image like the one below appear after a few moments in the community gallery with your name and approximate location.

5. Add some bird seed to the feeder tray and wait for some avian visitors. It can take a while for birds to start using a new bird feeder, so don't be disappointed by a lack of bird photos in the first few weeks!
Thanks for setting up your bird feeder, I hope you enjoy it! If your bird weight data looks odd (too high, too low, no birds detected etc) your bird feeder may need recalibration after shipping. For instructions on how to do this see the README for the project on GitHub or email me at [email protected].
Happy birding 🐦