Laptop Sticker Collection

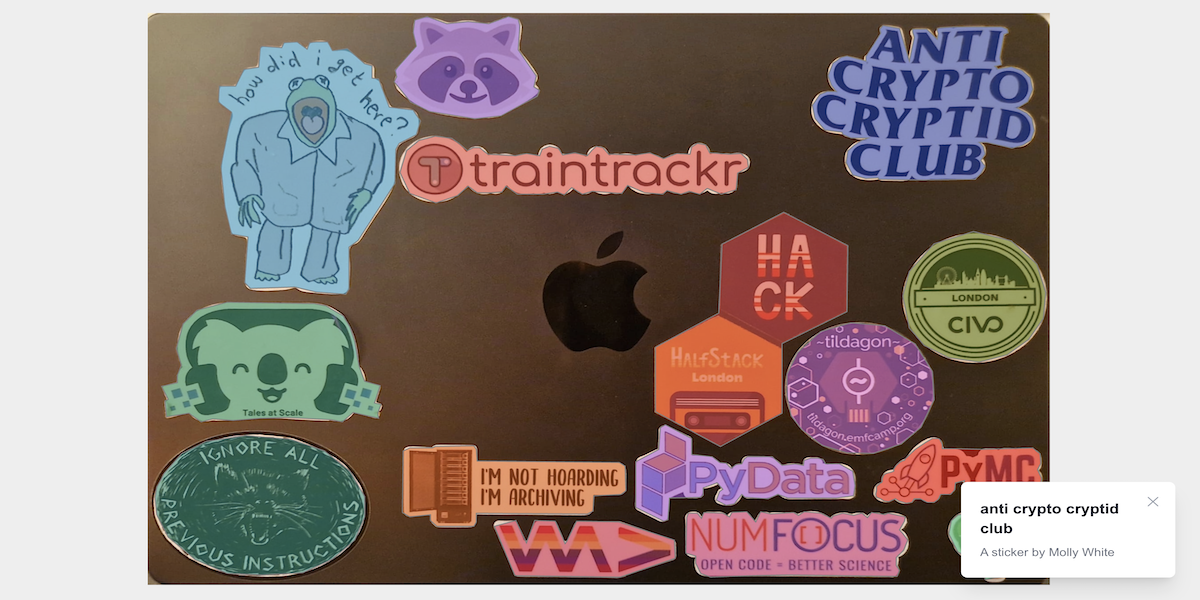
My friend Leo built this cool web app for annotating his laptop stickers to record where he got them. This tickled the sticker-goblin and developer advocate parts of my brain, so I nagged Leo until he shared the source code with me. He did so graciously on the condition I contribute to it.
Try clicking on the stickers below to see where I got them.
Go fullscreen here.
You can find the source code for this project in the GitHub repo (hassling Leo optional). You can also try creating your own sticker gallery here on my site if you don't fancy getting stuck into the code just yet.
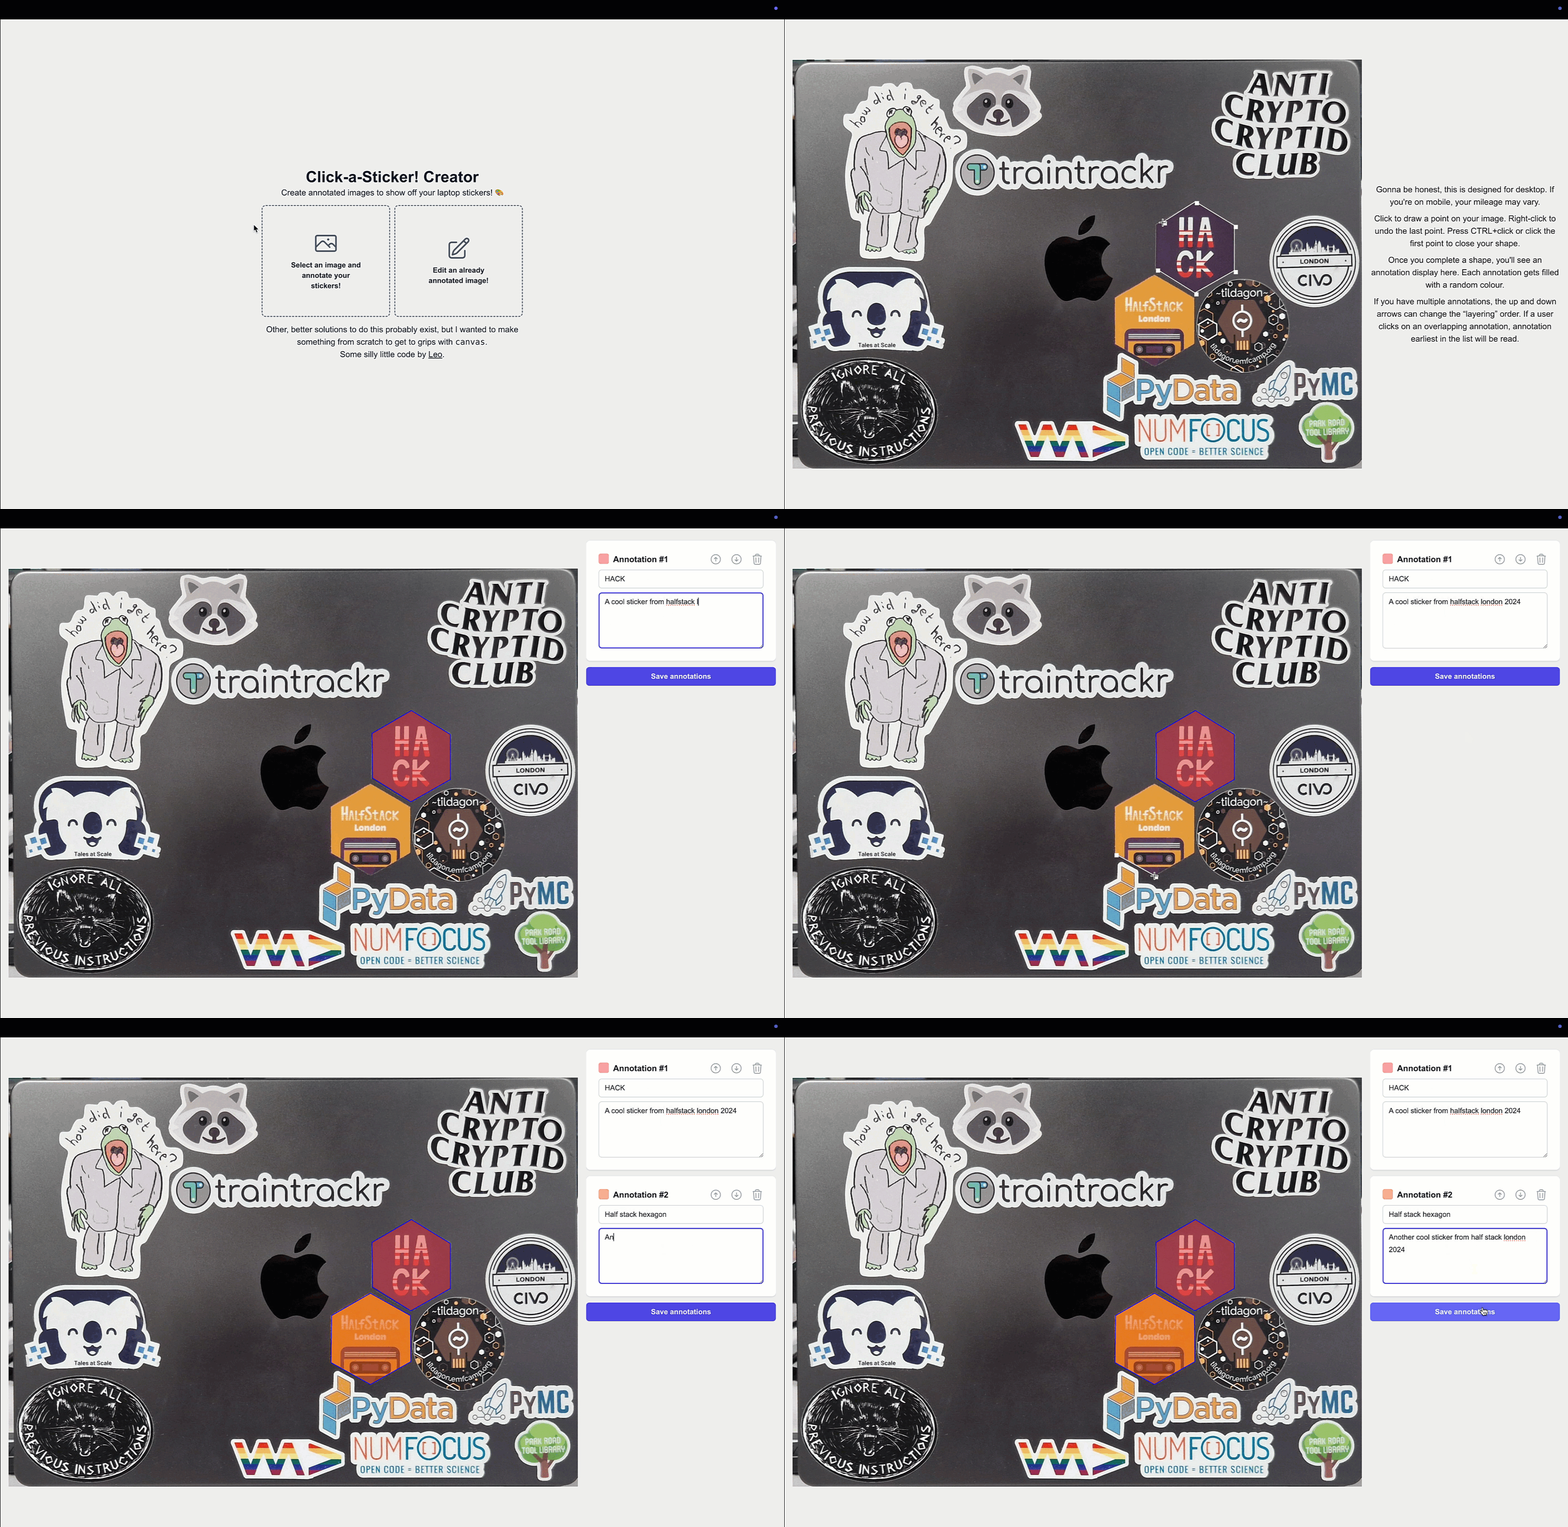
In exchange for this delicious code I added a couple of features: a simple button to open the annotation generate tab from the main page and an option to replace your image with a new one when you get more stickers.
I used Claude pretty heavily because I don't pretend for one minute to know about front-end development (I'm a data guy after all) so had to check the changes Claude suggested pretty closely and do some tweaking to get the new code to match the style of Leo's code.
I also worked on adding some instructions to the README to help people create their own sticker galleries and to contribute to the project.
My next challenge was to create my own sticker gallery and upload it here. This was fairly simple but required some minor changes to the stickers project code and to my Jekyll configuration.
I updated the next.config.ts file with the below config to change the export config to include the relative path to the location on my site I would be putting the export static code and to configure the static site to be exported to the out directory with output: 'export'.
const nextConfig: NextConfig = {
    output: 'export',
    trailingSlash: true,
    images: {
      unoptimized: true,
    },
    assetPrefix: '/projects/stickers',
    // Add basePath for deployment in a subdirectory
    basePath: '/projects/stickers', // Adjust this to where you'll host it in your Jekyll site
};
Before building, I used the project to build my own sticker gallery and took the exported annotation.json file and replaced the default one in the stickers project.

Annotating stickers
I then built the project in the usual way with npm run build. I copied the contents of the out file into my Jekyll project and updated the _config.yml file with the below so that my Jekyll build would pick up the Next.js project files properly.
include:
  - _next
  - "**/_next/**"
Finally, I could add my stickers gallery to this post with an iframe like so:
<iframe src="/projects/stickers/index.html" width="100%" height="500px"></iframe>
Building my sticker gallery was super quick and fun thanks to this awesome tool from Leo. It was fun to contribute features and to help make the project more accessible for others to contribute too. I hope this blog inspires you to try making your own sticker gallery and to maybe get involved in trying your hand at contributing to this project.
This project is one of the first from notanother.pizza a community of community organisers and developer advocacy folks mostly based in London, you can check out our other projects here.
